
This no-knead honey oat bread is a soft, chewy, and slightly sweet loaf that’s perfect for beginners. It requires no mixer, no kneading, and minimal hands-on time—just mix, let it rise overnight, and bake. The combination of oats, honey, and a touch of cinnamon creates a flavorful bread ideal for breakfast toast, sandwiches, or a cozy snack.
Full Recipe:
Ingredients
- 3 cups + 2 tablespoons (410g) bread flour, divided
- 1 cup (85g) old-fashioned whole oats or quick oats (not instant)
- 1½ teaspoons (4g) instant or active dry yeast
- 1½ teaspoons salt
- ½ teaspoon ground cinnamon
- 1½ cups (360ml) water, close to room temperature (about 70°F/21°C)
- 6 tablespoons (128g) honey
- 2 tablespoons (30ml) vegetable oil or other neutral-tasting oil
Directions
- In a large ungreased bowl, whisk together 3 cups (390g) of bread flour, oats, yeast, salt, and cinnamon. In a separate bowl, whisk the water, honey, and oil until combined. Pour the wet mixture into the dry ingredients and gently stir with a silicone spatula or wooden spoon until combined. The dough will be heavy and very sticky. Do not overwork the dough.
- First Rise: Cover the bowl tightly with plastic wrap or aluminum foil and let it sit at room temperature for 12–18 hours. The dough should nearly double in size and have a bubbly surface.
- Grease a 9×5-inch loaf pan.
- Gently fold in the remaining 2 tablespoons (about 20g) of bread flour into the dough. Turn the dough out onto a lightly floured surface. Using floured hands, gently shape it into an 8×4-inch loaf. Place the dough into the prepared pan and, using a sharp knife or bread lame, score the top with a shallow slash down the center.
- Second Rise: Loosely cover the loaf with plastic wrap or aluminum foil and let it rise at room temperature for about 1 hour, or until the dough rises slightly above the rim of the pan.
- Preheat the oven to 375°F (191°C).
- Remove the covering from the loaf and bake for 50–60 minutes. Tent the loaf with aluminum foil after 30 minutes to prevent over-browning. The bread is done when it sounds hollow when tapped or when an instant-read thermometer inserted into the center reads 195°F (90°C).
- Remove the bread from the oven and allow it to cool in the pan for at least 15 minutes on a wire rack before slicing and serving. For best results, let it cool completely before slicing.
- Store leftover bread covered at room temperature for up to 3 days or in the refrigerator for up to 10 days.
Nutrients
While the original recipe does not provide specific nutritional information, an approximate analysis per slice (assuming 12 slices per loaf) is as follows:
- Calories: Approximately 180–200 kcal
- Total Fat: 3–4g
- Saturated Fat: 0.5–1g
- Cholesterol: 0mg
- Sodium: 200–250mg
- Total Carbohydrates: 35–40g
- Dietary Fiber: 2–3g
- Sugars: 6–8g
- Protein: 4–5g
The Benefits of No-Knead Bread
One of the biggest advantages of no-knead bread is its simplicity. Traditional bread recipes typically involve kneading the dough, which can be tiring and requires a certain level of skill to achieve the right texture. With no-knead bread, however, the dough is simply mixed together and left to rise slowly over an extended period, which helps to develop the dough’s flavor and texture naturally.
The long fermentation process allows the dough to develop a deeper flavor profile, making it tastier than breads made with quicker methods. The simplicity of the recipe also means that you don’t need a stand mixer or specialized equipment. All you need is a large bowl, a spoon, and a baking pan, which makes this recipe perfect for anyone without access to fancy kitchen gear.
The Role of Honey and Oats
Honey and oats are two of the key ingredients in this particular no-knead bread recipe, and they bring both flavor and texture to the bread.Honey, a natural sweetener, is an excellent addition to bread as it not only imparts a subtle sweetness but also helps keep the bread moist. It works to balance out the savory flavors from the bread flour and enhances the overall taste of the loaf. The honey also promotes a beautifully golden-brown crust, giving the bread its inviting appearance. Unlike refined sugar, honey adds a touch of natural complexity to the flavor profile, making it a healthier choice in baking.
Texture and Flavor of the No-Knead Honey Oat Bread
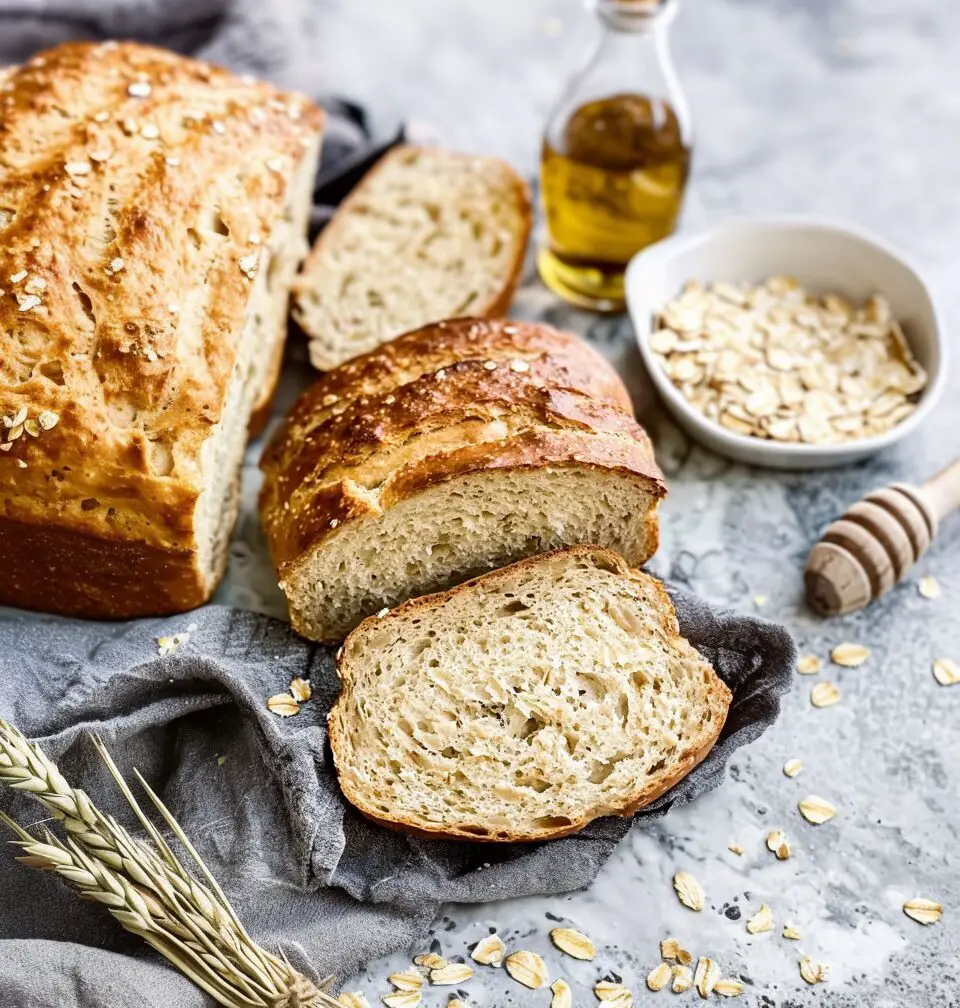
One of the highlights of this bread is its texture. The no-knead method results in a soft, moist interior with a slightly chewy bite that is incredibly satisfying. The oat flakes, although incorporated into the dough, also add a subtle texture to the crust, making each bite more interesting. The crust itself is golden and slightly crisp, offering the perfect contrast to the soft crumb.
The flavor of the bread is subtly sweet from the honey, with the oats adding a nutty undertone. The bread is flavorful enough to be eaten on its own or used as a base for sandwiches, but it also works beautifully with a variety of spreads such as butter, jam, or peanut butter. It’s also versatile enough to pair with savory dishes like soups and stews, making it a great addition to almost any meal.
Tips for Perfecting Your No-Knead Honey Oat Bread
While this recipe is simple, there are a few tips to help you ensure success.
-
Use the Right Flour: Bread flour is the best choice for no-knead bread, as it contains more gluten than all-purpose flour, which gives the bread its structure. It’s worth using bread flour to get the right texture, as all-purpose flour might yield a slightly denser loaf.
-
Give the Dough Time to Rise: The most important factor in no-knead bread is patience. The dough needs a long, slow rise to develop flavor and texture. While it may seem like the dough isn’t doing much, trust the process. The dough should rise at least overnight for the best results. If you’re in a rush, it’s possible to speed up the process by allowing the dough to rise in a warmer spot, but the flavor won’t be as developed.
-
Handling the Dough: Although the dough is sticky, try to avoid adding too much flour during the shaping process. The more flour you incorporate, the drier the dough will become, which can affect the texture of the bread. If the dough feels too sticky to handle, lightly wet your hands instead of adding flour.
-
Baking in a Covered Pan: If you want a perfectly golden and crispy crust, consider baking the bread in a Dutch oven or a covered baking dish. This traps steam, helping the bread to bake more evenly and develop a beautiful crust. If you don’t have a covered pan, you can still achieve great results by covering the loaf with aluminum foil during the first half of baking.
-
Storing the Bread: Once baked, let the bread cool completely on a wire rack before slicing. If you store the bread while it’s still warm, it may become soggy. To keep the bread fresh, store it in a bread box or wrap it in a clean kitchen towel. You can also freeze the bread for up to three months if you want to save some for later.
Conclusion
The No-Knead Honey Oat Bread is a fantastic recipe for anyone looking to make homemade bread without all the hassle. It combines simplicity with flavor and texture, making it an accessible option for both beginner and experienced bakers alike. With its soft, chewy crumb, slightly crisp crust, and a subtle sweetness from honey, this bread is perfect for a variety of occasions, from breakfast to dinner.